Wednesday, March 6, 2013
Introduction
The photos below are a mixture of photos taken by myself and my cousin Eriq Brye (with the exception of 3 photos found on the internet). I used his computer to do all of the manipulating because my Mac had crashed and I was really in a crunch to get this project finished. So, if you are wondering why all the screenshots show me using CS5 Photoshop, that's why. I hope that is alright.


Walk

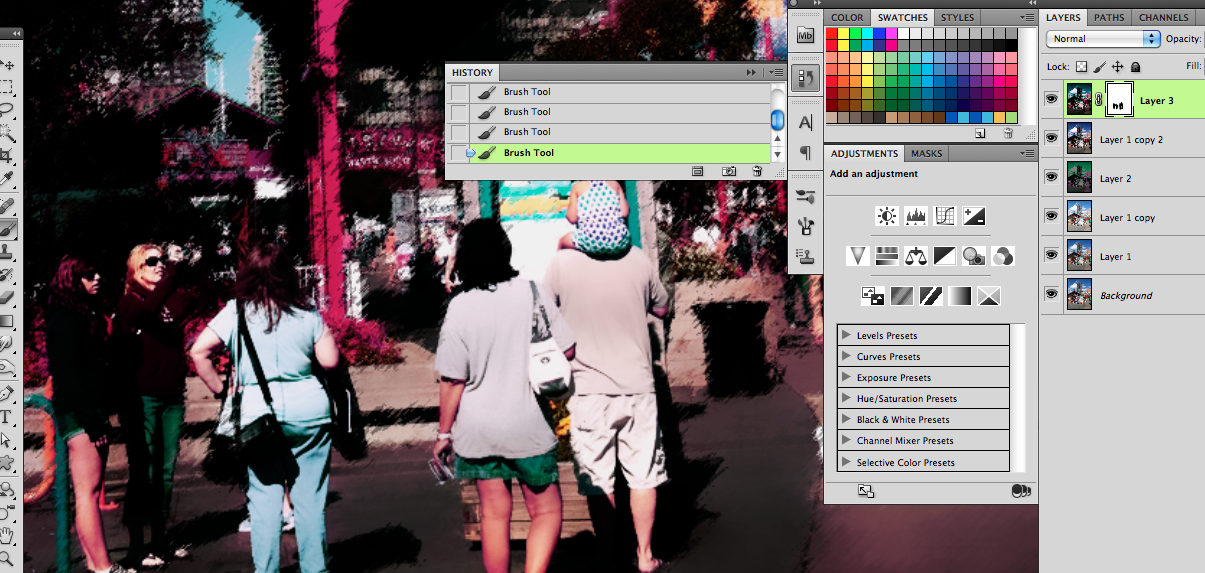
In this photo, I made a surface blur, added photo filter called sprayed strokes, adjusted the levels, masked out all the people from the filter used.
Photo used was taken by my cousin Eriq Brye on a vacation with his family in Chicago.


Emotional Reaction- Space Invader

This photo is used to create an emotional feel. It is depicted to seem as if you are sitting in the seat of the viewer. The photo was taken while driving, however, the actual purpose is to make it seem as if the viewer is driving very fast. The burn tool was used to make the glare in the sky seem darker, as if those lights were actually in the sky.
This photo was taken by Austin Stovall
This photo was taken by Austin Stovall


Skreet

The only technique used in this photo was the clone tool to remove the man and vehicle.
This photo was taken by Eriq Brye


Robot

I used the crystallize effect and lowered its opacity to show more of it. Added a few photo filters and adjusted the levels, brightness, and contrast. All the layers used were set to normal except for the photo taken by myself. That layer was set to Darken.
This photo was taken by Eriq Brye in Chicago
There is a second photo used in this photo that was taken by Austin Stovall
This photo was taken by Eriq Brye in Chicago
There is a second photo used in this photo that was taken by Austin Stovall


Metaphor- High School

This is my high school. The clouds were used to convey that the school is literally at a high altitude.
I put Pike High school on top of the clouds, then masked out selected areas to make it seem like it is sitting under the clouds.
Clouds taken by Jeannie Belgrave http://jeanniebelgrave.wordpress.com/2008/03/02/22/
Pike High School - https://encrypted-tbn1.gstatic.com/images?q=tbn:ANd9GcQKZb00HXTQ8seXPWK4ggxLvgI4EO2_xi-_IEStslIX7eBXeOJz


Manjo

Photo of the man taken by Eriq showcased filter blur and surface blur. Added my picture and set it to screen and lowered opacity to 82% and fill to 41%. Added another layer and set it to color dodge.
Main photo taken by Eriq Brye
Secondary photo taken by Austin Stovall
Main photo taken by Eriq Brye
Secondary photo taken by Austin Stovall


Gundam

The Gundam was added and masked out. A drop shadow and inner shadow was added, then set the layer to Lighten. Created a new layer and pressed "apply image" which gave it the shiny effect. Duplicated the layer once more and set color burn to give it the glow. Gaussian blur filter was used. Added a third image which features the swirls in the sky. Set the opacity down to 41%.
Swirl effect photo taken by Austin Stovall
Ferris Wheel taken by my cousin Eriq Brye on a vacation with his family in Chicago.
http://www.gundammodelkits.com/wp-content/uploads/2010/05/Gundam-Model-Kit-Real-Grade-1144-RX-78-2-Details-01.jpg


Bud

Duplicated the layer and added Gaussian blur. Adjusted the brightness and contrast. Added my photo and set that layer to Overlay. Dropped the opacity to 97%. Added a new layer and made it all black. Set that layer to Screen. Dropped opacity to 42% and the fill to 11%.
Long exposure lights taken by Austin Stovall
Budweiser photo taken by Eriq Brye


Blox

Used the marquee tool to make a square, then colored it in. Then used the burn tool and marquee tool in conjunction. The burn tool was used to add the shadowy effect on the lines.
This was created in photoshop.


Subscribe to:
Posts (Atom)